Admin Panel
GeoPulse includes a built-in Admin Panel for managing users, user invitations, OIDC providers, and system settings through a web interface. This guide covers how to promote the first administrator and use the available admin features.
Promoting the First Administrator
Before accessing the Admin Panel, you need at least one user with the ADMIN role. GeoPulse supports automatic first-user bootstrap for self-hosted installs and an explicit admin email override.
First User Admin Bootstrap
| Environment Variable | Default | Description |
|---|---|---|
GEOPULSE_FIRST_USER_ADMIN | true | Promote the first registered user to ADMIN when no admin email is set |
GEOPULSE_ADMIN_EMAIL | (none) | Email address of the user to automatically promote to ADMIN; takes priority |
With the default configuration, the first account created in a fresh GeoPulse database receives the ADMIN role. If a database already has exactly one user and no admin, GeoPulse promotes that user on startup. If a database has multiple users and no admin, GeoPulse does not guess; use GEOPULSE_ADMIN_EMAIL or emergency recovery.
If your instance is reachable by other people before you register, the first visitor could claim admin access. In that case, set GEOPULSE_ADMIN_EMAIL before exposing GeoPulse.
Using GEOPULSE_ADMIN_EMAIL
Set this variable to the email address of the user who should become administrator:
GEOPULSE_ADMIN_EMAIL=admin@example.com
How it works:
- New user registration: If a user registers with this email address, they will automatically receive the
ADMINrole. - Existing user: If a user with this email already exists, they will be promoted to
ADMINon startup or on their next login. - Precedence: When
GEOPULSE_ADMIN_EMAILis set, first-user bootstrap does not promote a different first user.
If you're already logged in when setting GEOPULSE_ADMIN_EMAIL, restart the backend and then log out and log back in so your session receives the updated role.
Once you have an admin user, they can promote other users to ADMIN through the Admin Panel UI.
Emergency Password Recovery
If an administrator forgets their password and no other admin can log in, reset it from the backend container:
docker compose exec geopulse-backend geopulse admin reset-password --email admin@example.com
For Kubernetes or Helm deployments:
kubectl exec deploy/<release-name>-geopulse-backend -- geopulse admin reset-password --email admin@example.com
By default, the command:
- only resets users who already have the
ADMINrole - generates a temporary password and prints it once
- reactivates the account if it was disabled
- uses the same bcrypt password hashing as normal GeoPulse authentication
Set a specific password instead of generating one:
docker compose exec geopulse-backend geopulse admin reset-password \
  --email admin@example.com \
  --password 'new-secure-password'
If the target account is not currently an admin, explicitly promote it while resetting the password:
docker compose exec geopulse-backend geopulse admin reset-password \
  --email admin@example.com \
  --promote
Treat this as an emergency operator command. Anyone with shell access inside the backend container can reset administrator credentials. After logging in with a generated temporary password, change it from the user profile security settings.
Docker Compose Example
services:
  geopulse:
    image: tess1o/geopulse:latest
    environment:
      GEOPULSE_FIRST_USER_ADMIN: "true"
      GEOPULSE_ADMIN_EMAIL: admin@example.com
      # ... other environment variables
Kubernetes/Helm Configuration
Configure in values.yaml:
config:
  admin:
    email: "admin@example.com"
    firstUserAdmin: true
Apply with: helm upgrade geopulse ./helm/geopulse -f custom-values.yaml
For more details, see the Helm Configuration Guide.
Accessing the Admin Panel
Once you have admin privileges, access the Admin Panel at:
https://your-geopulse-instance/app/admin
The Admin Panel is only visible to users with the ADMIN role.
Admin Dashboard
The Admin Dashboard (/app/admin) provides a system overview with quick statistics:
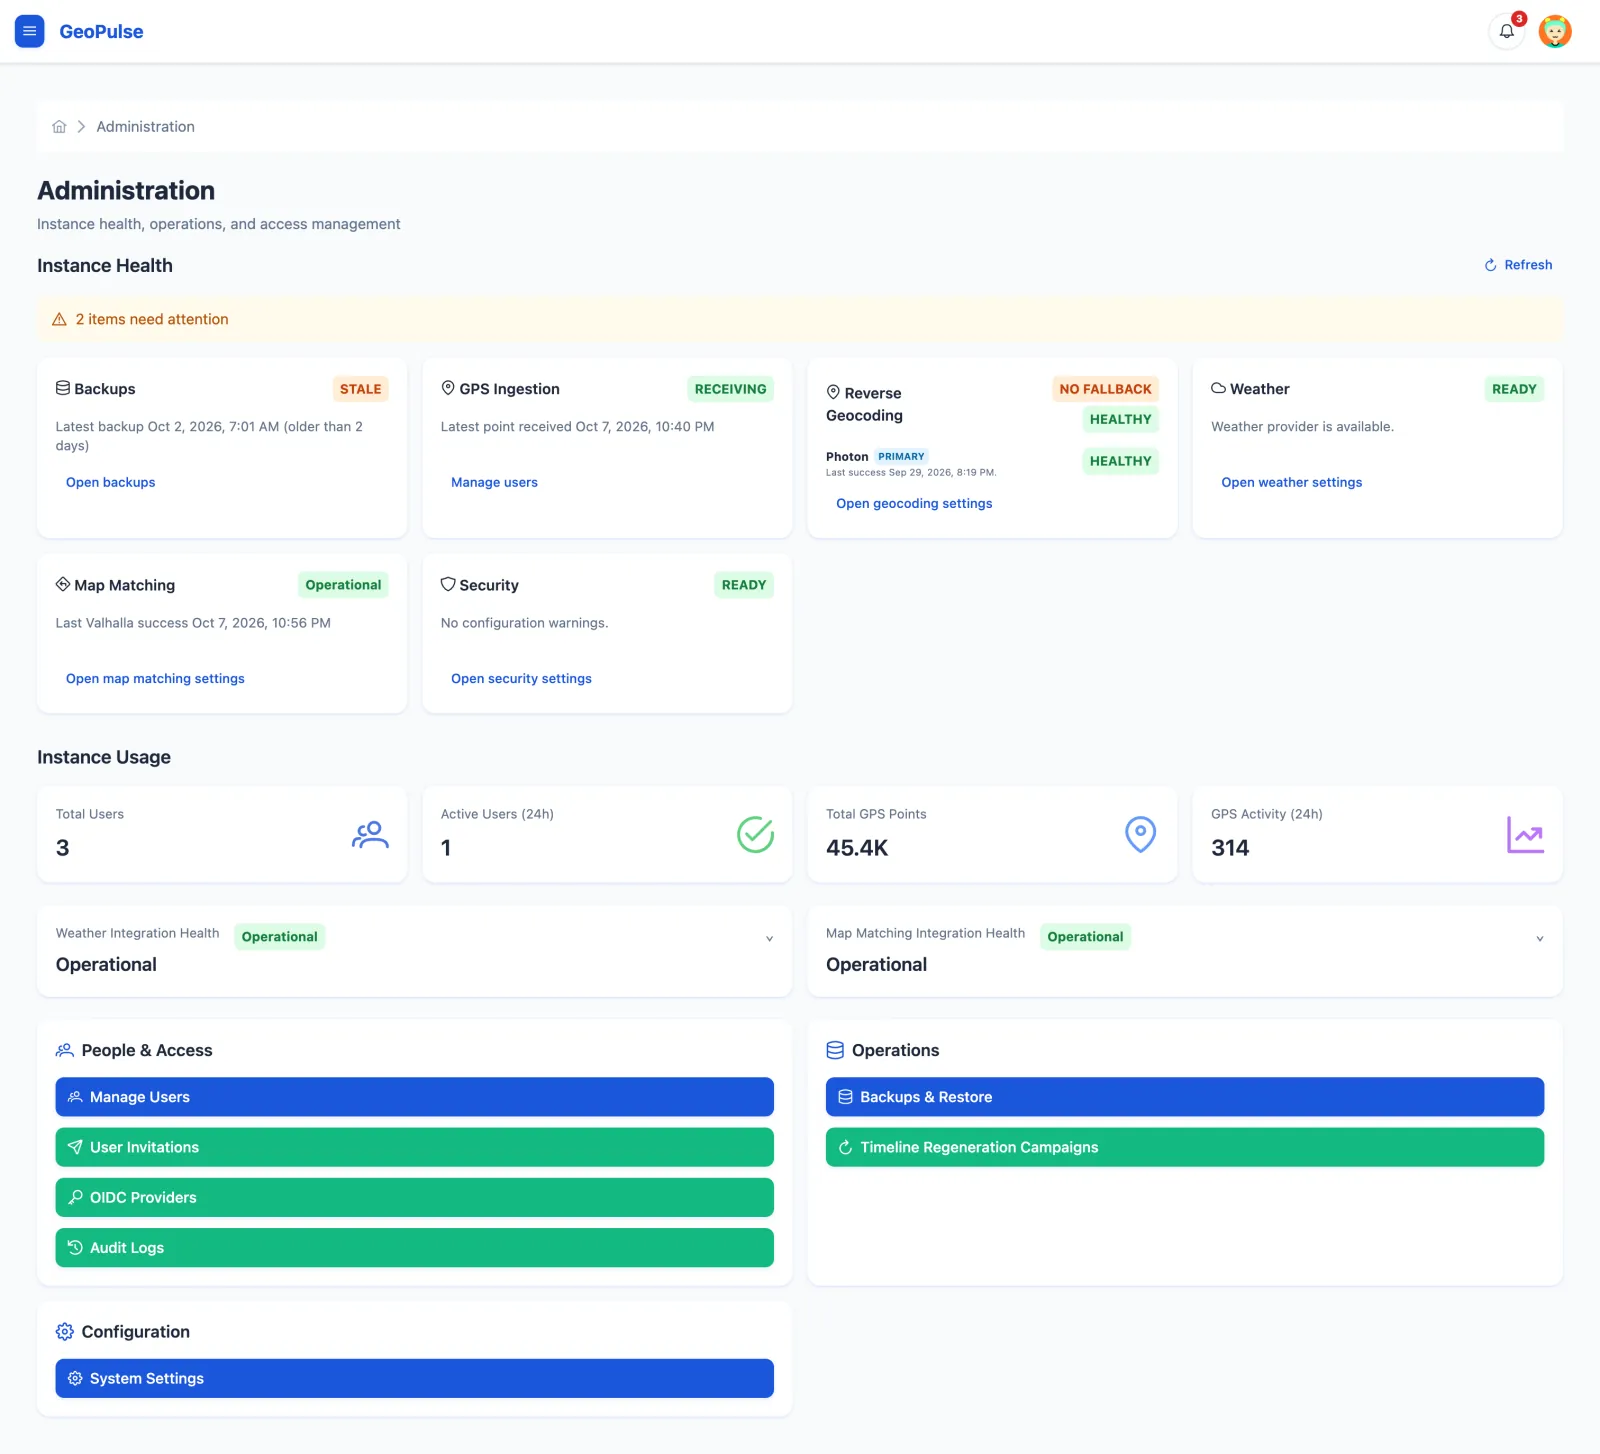
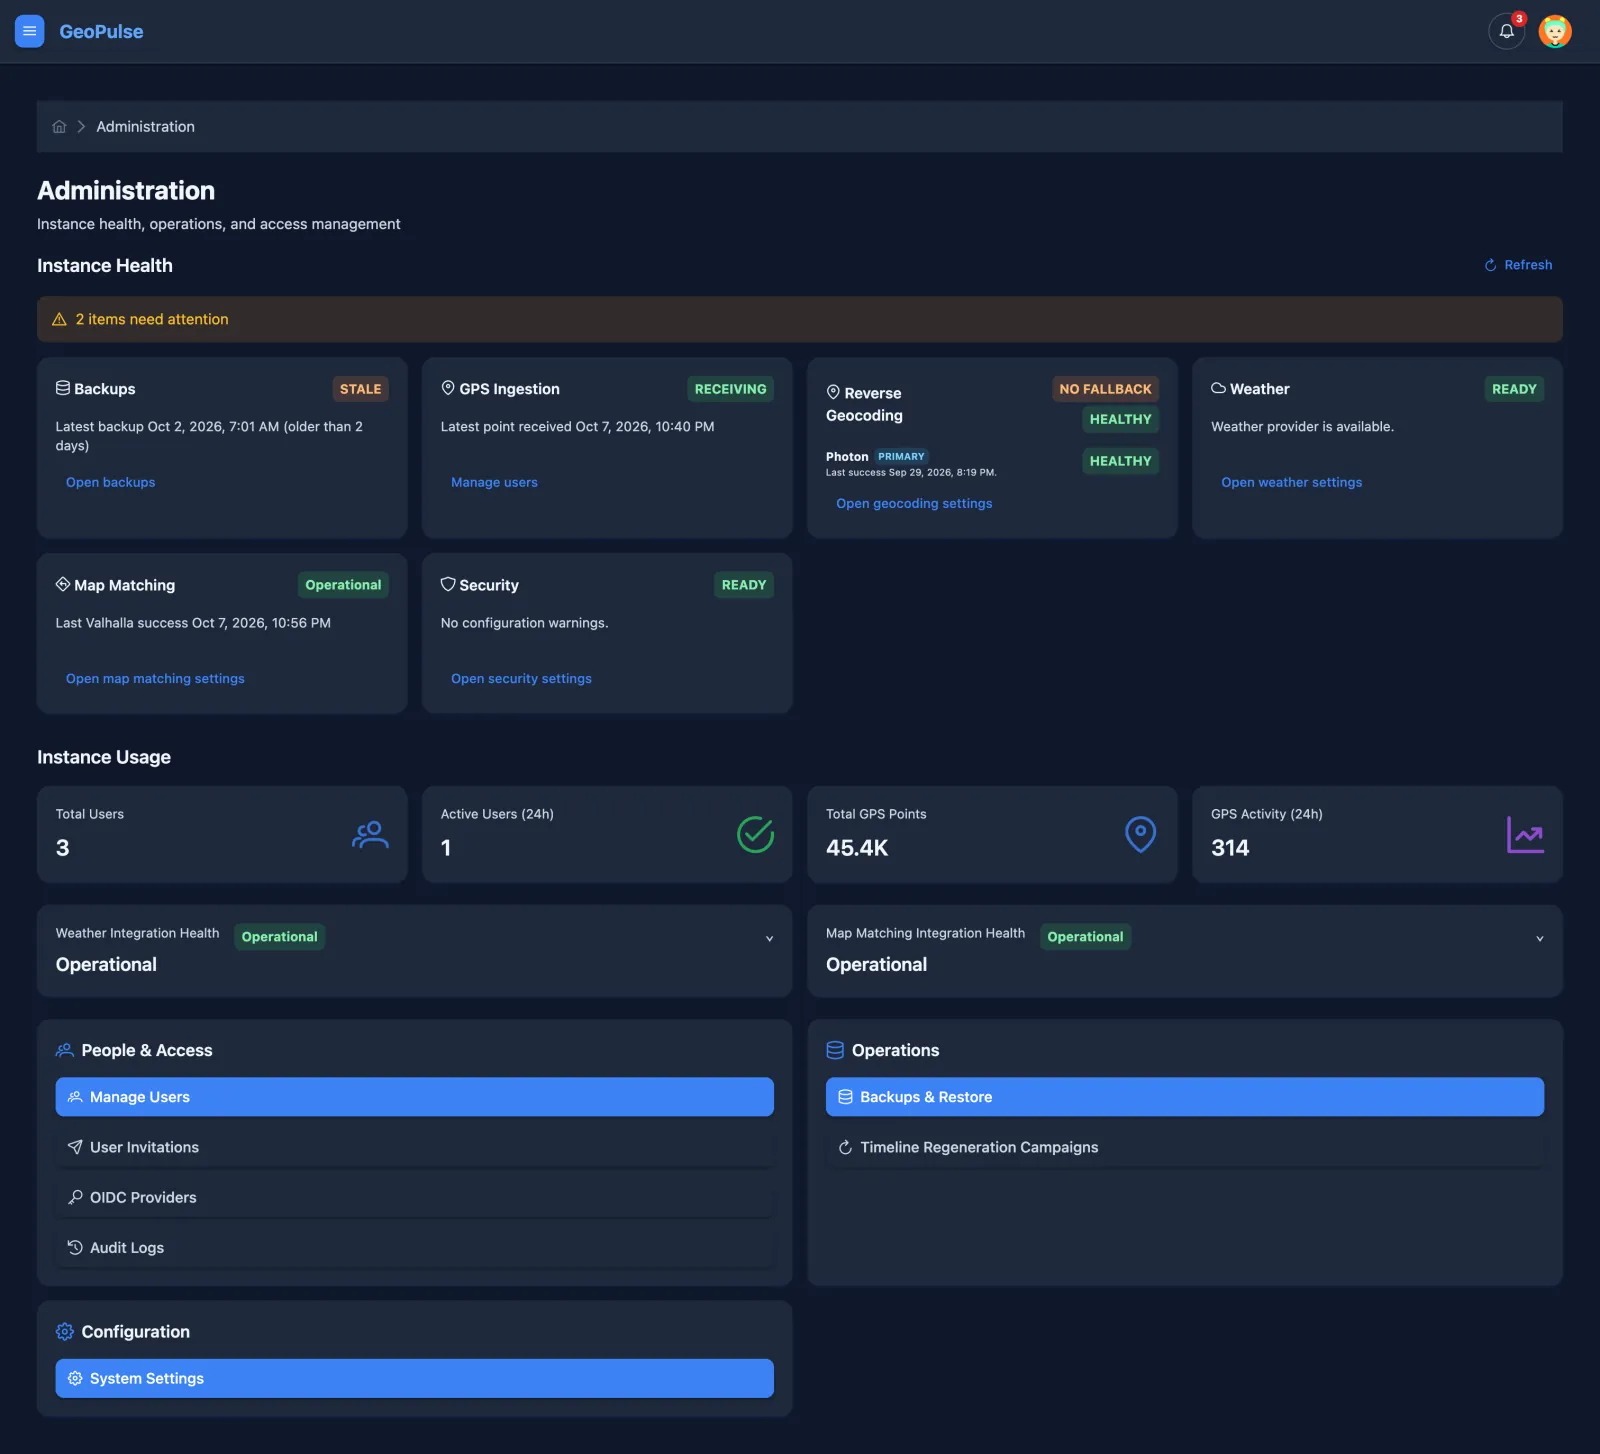
| Metric | Description |
|---|---|
| Total Users | Total number of registered users |
| Active Users (24h) | Users who received GPS data within the last 24 hours |
| Total GPS Points | Total GPS data points across all users |
| Memory Usage | Current backend memory usage in MB |
The dashboard also provides quick links to:
- User Management - Manage user accounts
- User Invitations - Generate invitation links for new users
- OIDC Providers - Configure authentication providers
- System Settings - Configure system-wide settings
- Timeline Regeneration - Create and monitor forced timeline regeneration campaigns
- Audit Logs - Review administrative actions and system changes
User Management
Navigate to Admin Dashboard > Manage Users or /app/admin/users.
Features
| Action | Description |
|---|---|
| Search Users | Search users by email or name |
| View Details | Click on a user email to see detailed user information |
| Enable/Disable | Toggle user account status (disabled users cannot log in) |
| Delete User | Permanently delete a user and all their data |
User Details Page
Click on a user to view:
- User profile information (email, name, role)
- Account status (active/disabled)
- Registration date
- GPS points count
- Option to promote/demote user role
Promoting Users to Admin
From the User Details page, administrators can:
- Promote to ADMIN: Grant admin privileges to a regular user
- Demote to USER: Remove admin privileges (cannot demote yourself)
Be cautious when granting admin privileges. Admins can modify system settings, delete users, and access all administrative functions.
User Invitations
Navigate to Admin Dashboard > User Invitations or /app/admin/invitations.
The User Invitations feature allows administrators to generate secure, one-time registration links for inviting specific users to join your GeoPulse instance. Invitation links work even when public registration is disabled, making them ideal for private or controlled-access deployments.
Key Features
| Feature | Description |
|---|---|
| Bypass Registration Checks | Invitation links allow registration even when public registration is disabled |
| Single-Use Tokens | Each invitation can only be used once for registration |
| Customizable Expiry | Set custom expiration dates (default: 7 days) |
| Secure Tokens | 64-character cryptographically secure tokens using SecureRandom |
| Status Tracking | Monitor invitation status (Pending, Used, Expired, Revoked) |
| Audit Logging | All invitation actions are logged for security |
Creating an Invitation
- Click Create Invitation button
- Set the expiration date (or use the default 7-day expiry)
- Click Create
- Copy the generated link and share it with the intended user
The invitation link format:
https://your-geopulse-instance/register/invite/{token}
Invitation Statuses
| Status | Description |
|---|---|
| Pending | Invitation is valid and can be used |
| Used | Invitation was successfully used for registration |
| Expired | Invitation has passed its expiration date |
| Revoked | Invitation was manually revoked by an administrator |
Managing Invitations
The invitations table displays:
- Token - First 12 characters of the invitation token
- Created By - Administrator who created the invitation
- Created - Creation timestamp
- Expires - Expiration timestamp
- Status - Current invitation status
- Used By - User who registered with this invitation (if used)
Actions
| Action | Description | Availability |
|---|---|---|
| Copy Link | Copy the invitation URL to clipboard | Pending only |
| Revoke | Cancel an unused invitation | Pending only |
Configuration
Configure the base URL for invitation links:
| Environment Variable | Default | Description |
|---|---|---|
GEOPULSE_INVITATION_BASE_URL | (empty) | Custom domain for invitation links (e.g., https://geopulse.example.com) |
If not set, the frontend will use window.location.origin to construct invitation URLs.
Docker Compose Example:
services:
  geopulse:
    image: tess1o/geopulse:latest
    environment:
      GEOPULSE_INVITATION_BASE_URL: https://geopulse.example.com
      # ... other environment variables
Kubernetes/Helm Configuration:
config:
  invitation:
    baseUrl: "https://geopulse.example.com"
User Registration Flow
When a user receives an invitation link:
- User clicks the invitation link
- GeoPulse validates the token (checks if it's valid, not expired, not used, not revoked)
- User completes the registration form (email, password, name, timezone)
- Account is created and invitation is marked as used
- User is automatically logged in and redirected to onboarding
Invitations are perfect for private GeoPulse instances where you want to control who can register. Simply disable public registration and use invitation links to selectively allow specific users to join.
- Invitation tokens are cryptographically secure and cannot be guessed
- Each token is 64 characters long and can only be used once
- Expired or revoked invitations cannot be used for registration
- All invitation actions are logged to the audit log
OIDC Provider Management
Navigate to Admin Dashboard > OIDC Providers or /app/admin/oidc-providers.
This page allows you to manage OAuth/OIDC authentication providers through the UI instead of environment variables.
Provider List
The table displays all configured providers with:
| Column | Description |
|---|---|
| Name | Provider identifier (e.g., google, keycloak) |
| Display Name | User-friendly name shown on login page |
| Enabled | Whether the provider is active |
| Source | Environment (from env vars) or Custom (from database) |
| Metadata | Whether OIDC discovery metadata is cached |
| Client ID | The OAuth client ID |
Actions
| Action | Description |
|---|---|
| Add Provider | Create a new OIDC provider configuration |
| Edit Provider | Modify provider settings |
| Enable/Disable | Toggle provider availability |
| Test Connection | Verify provider connectivity and discover endpoints |
| Delete Provider | Remove provider (environment-only providers cannot be deleted) |
Provider Sources
- Environment: Provider configured via environment variables. These cannot be deleted, only customized.
- Custom (Database): Provider created through the Admin UI. These can be fully managed.
When a provider exists in both environment and database, the database configuration takes precedence. Deleting a custom configuration for an environment provider reverts it to the environment defaults.
For initial OIDC setup via environment variables, see OIDC / SSO Configuration.
System Settings
Navigate to Admin Dashboard > System Settings or /app/admin/settings.
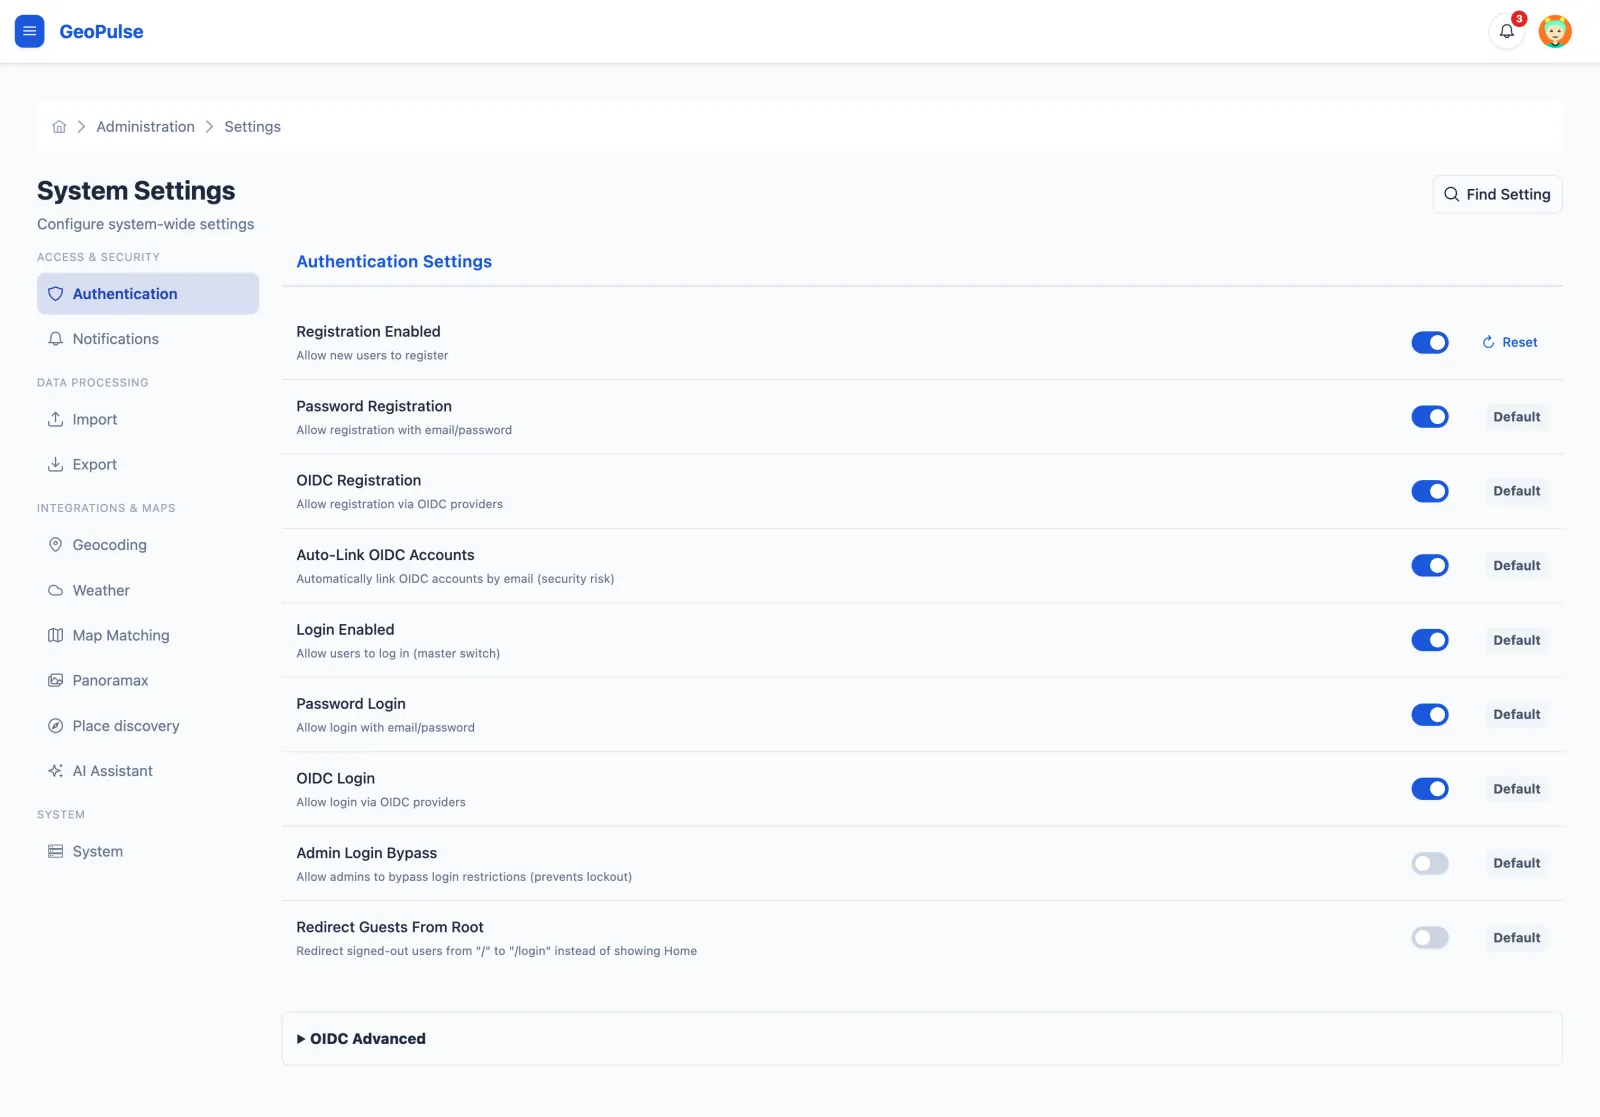
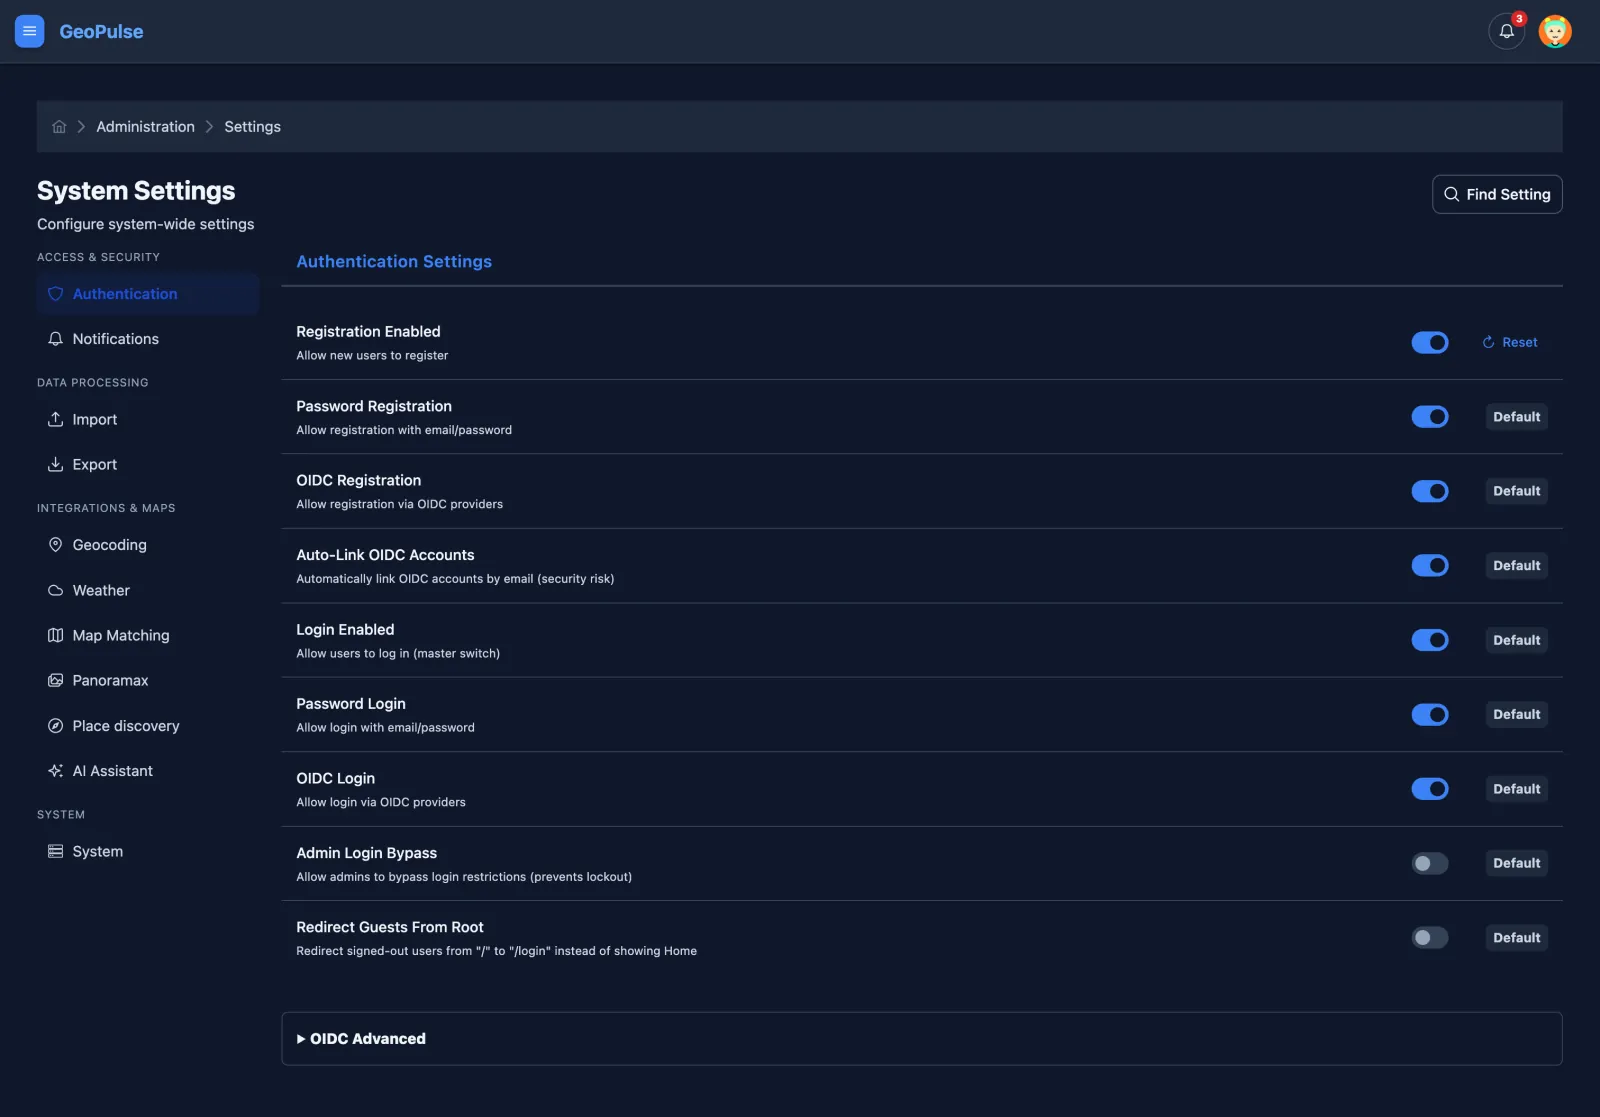
The System Settings page provides UI-based configuration for various system options, organized into tabs.
Application Logging
The System > Observability section controls the backend application log level at runtime. Choose ERROR, WARN, INFO, or DEBUG; the page shows the configured value, effective value, and whether it came from the Admin setting, environment, or application default. Admin values take precedence over GEOPULSE_LOG_LEVEL and are applied immediately on the current replica and within 30 seconds on other replicas.
Use Use environment/default to remove the persisted override. DEBUG is intentionally accompanied by a verbosity warning and should be temporary. Log-level changes are audited by actor, action, and key without recording the old or new level.
Authentication Tab
Configure user registration behavior:
| Setting | Description | Default |
|---|---|---|
| Registration Enabled | Master switch for all new user registrations | true |
| Password Registration | Allow registration with email/password | true |
| OIDC Registration | Allow registration via OIDC providers | true |
| Auto-Link OIDC Accounts | Automatically link OIDC accounts by email | false |
Auto-Link OIDC Accounts poses a security risk if OIDC providers don't verify email addresses. Only enable if you trust all configured providers.
Geocoding Tab
Configure reverse geocoding providers:
General Settings:
- Primary Provider: Main geocoding service, including enabled custom providers
- Fallback Provider: Backup provider if primary fails
- Request Delay: Milliseconds between geocoding requests
Provider Availability:
- Enable/disable individual geocoding providers
Provider Configuration:
- Custom URLs for self-hosted built-in providers (Nominatim, Photon)
- API keys for commercial built-in providers (Google Maps, Mapbox, Geoapify, ChibiGeo)
- Custom Photon-compatible or Nominatim-compatible providers, including optional encrypted request headers and per-provider delays
Custom geocoding providers cannot be disabled or deleted while they are selected as the primary or fallback provider.
Notifications Tab
The Notifications tab includes Apprise Notifications configuration:
- Enable/disable Apprise delivery
- Configure Apprise API URL
- Set optional encrypted API token
- Configure request timeout and TLS verification
- Run connectivity tests directly from the Admin UI
- Configure geofence event cleanup enabled/retention settings
For full setup guidance, see Apprise Notifications.
Coming Soon
The following tabs show planned features:
- GPS Processing: Stay detection algorithms, accuracy filtering, batch processing
- Import: Import job limits and concurrent processing settings
- System (additional): Performance tuning, database maintenance, metrics configuration
Audit Logs
Navigate to Admin Dashboard > Audit Logs or /app/admin/audit-logs.
The Audit Logs page provides a comprehensive view of all administrative actions performed in your GeoPulse instance, allowing administrators to track system changes, investigate issues, and maintain security compliance.
Key Features
| Feature | Description |
|---|---|
| Complete Action History | All administrative actions are automatically logged |
| Detailed Context | Each log entry includes before/after values and full action context |
| Powerful Filtering | Filter by date range, action type, target type, and admin user |
| IP Tracking | Records the IP address for each administrative action |
| Expandable Details | View full JSON details for each action with formatted viewer |
Audit Table
The audit log table displays the following information:
| Column | Description |
|---|---|
| Timestamp | Date and time when the action occurred |
| Admin | Email address of the administrator who performed the action |
| Action | Type of action with color-coded icon and tag |
| Target Type | Type of entity affected (Setting, User, OIDC Provider, Invitation) |
| Target ID | Identifier of the affected entity |
| IP Address | IP address from which the action was performed |
Available Filters
Use the filter panel to narrow down audit log entries:
| Filter | Description |
|---|---|
| Date Range | Select a start and end date to view actions within a specific time period |
| Action Type | Filter by specific administrative actions (see Action Types below) |
| Target Type | Filter by entity type (Setting, User, OIDC Provider, Invitation) |
| Admin Email | Search for actions performed by a specific administrator |
Action Types
The following administrative actions are logged:
User Management:
USER_ENABLED- User account was enabledUSER_DISABLED- User account was disabledUSER_DELETED- User account was permanently deletedUSER_ROLE_CHANGED- User role was changed (e.g., promoted to admin)USER_PASSWORD_RESET- User password was reset by an administrator
System Settings:
SETTING_CHANGED- A system setting value was modifiedSETTING_RESET- A system setting was reset to default value
OIDC Providers:
OIDC_PROVIDER_CREATED- New OIDC authentication provider was addedOIDC_PROVIDER_UPDATED- OIDC provider configuration was modifiedOIDC_PROVIDER_DELETED- OIDC provider was removedOIDC_PROVIDER_RESET- OIDC provider was reset to environment defaults
User Invitations:
INVITATION_CREATED- New user invitation was generatedINVITATION_REVOKED- Pending invitation was revoked
Timeline Regeneration Campaigns:
TIMELINE_REGENERATION_CAMPAIGN_CREATED- Timeline regeneration campaign was created by an administratorTIMELINE_REGENERATION_CAMPAIGN_RETRIED- Failed users in a timeline regeneration campaign were queued for retry
Administrative:
ADMIN_LOGIN- Administrator logged into the system
Action Details
Click on any row to expand and view detailed information:
| Detail | Description |
|---|---|
| JSON Viewer | Formatted view of the complete action context, including before/after values where applicable |
| Admin User ID | UUID of the administrator who performed the action |
| Full Timestamp | Complete date and time with timezone |
The JSON details typically include:
- Previous and new values for modifications
- User email for user-related actions
- Setting key and values for configuration changes
- Provider details for OIDC operations
- Token information for invitations
Use Cases
Security Monitoring:
- Track who is accessing admin functions
- Identify unauthorized or suspicious administrative actions
- Monitor user role changes and deletions
Compliance:
- Maintain audit trail for regulatory requirements
- Review configuration changes and their timeline
- Document user account lifecycle events
Troubleshooting:
- Investigate when and how settings were changed
- Trace the history of user account issues
- Identify the source of configuration problems
Accountability:
- See which administrator made specific changes
- Review actions performed during a particular time period
- Track OIDC provider and invitation management
Regularly review audit logs to ensure administrative actions align with your organization's policies and to detect any unusual activity early.
Audit logs are stored permanently in the database and are not automatically deleted. Consider implementing a data retention policy if storage becomes a concern.
Settings Hierarchy
Settings in the Admin Panel follow this precedence:
- Database (Custom): Settings changed via Admin UI are stored in the database and take highest priority
- Environment Variables: Default configuration from deployment
- Application Defaults: Built-in defaults if nothing else is configured
Each setting shows whether it's using the default value or a custom value. Custom values can be reset to defaults using the Reset button.